How to Meal Plan and Batch Cook Part 2
Last Updated on August 10, 2016 by Priscilla
I loved sharing Part One of my tips for meal planning and batch cooking in my previous post! I’m glad it has been helpful to you. With no further ado, I present you with Part 2, which should help answer some questions like:
– What do I package food in?
– What types of meals freeze best?
– How can I keep all of my recipes in one place?
– How do I make sure that I get all of the ingredients that I need?
– How should I structure my cook day?
Enjoy! And please don’t hesitate to leave questions in the comments section below, or share some of your own favorite cooking tips!
How to Meal Plan and Batch Cook – Part 2
6) Add Some Regional Flair
I suppose you can technically skip to #7, but I think this step actually helps narrow down the entrees you will choose. Think about specific regional cuisine for each of your proteins. Feeling like Asian takeout? Your favorite Italian dish? Pick up to four different types of regional cuisine and designate one to each of the entree types.
Example:
Crockpot – Beef Chuck Roast – 3.5 lbs. – Mexican
Soup – Half of Whole Chicken + 1 lb. ground beef – 5 lbs – American, Comfort Food
Casserole – Half a Whole Chicken – Italian
Stir-Fry – Ground Pork – 2 lbs. – Asian
7) Pick Your Recipes
You’re almost there! It’s time to decide on your recipes! Whether you are checking out Pinterest, cookbooks, or other food blogs on the web, decide upon the meals that fit your protein and regional cuisine choice.
Reminder from Part One: You’ll want some of your entree choices to be freezer-friendly. I recommend that prepared food stays in the fridge for 4 days from the time of cooking, and that whatever won’t be eaten by then gets frozen. Therefore, you want to freeze day 5-7 of your meal.
Entrees that freeze well: stews, soups, meatballs, casseroles, most items that are cooked in a sauce (I will link to my favorite freezable recipes either below or in a future post)
Don’t freeze: meat on the bone, raw vegetables, plain starches (steamed rice, baked potatoes, fried plantains)
Make sure that you SAVE the recipe you plan to use. If it’s a crowd pleaser, you’ll want to make sure that you can find it again easily. Pinterest is great to find new meal ideas, but I prefer saving specific recipes in Evernote. You can get the Evernote web clipper for your web browser for easy saving. Another reason to use Evernote is that you can also transcribe a recipe into Evernote if you are getting your recipe from a cookbook. I’ll talk more about why I use Evernote in steps 9 & 10. If you have any type of mobile device or tablet, you’ll want to make sure you have the Evernote app downloaded as well.
Example: Here are the meals that I picked. I’m guilty of never really using recipes as I find them, but I linked to recipes that are similar to what I made, or recipes that I adapted and changed up:
– Beef Barbacoa from Lexi’s Clean Kitchen
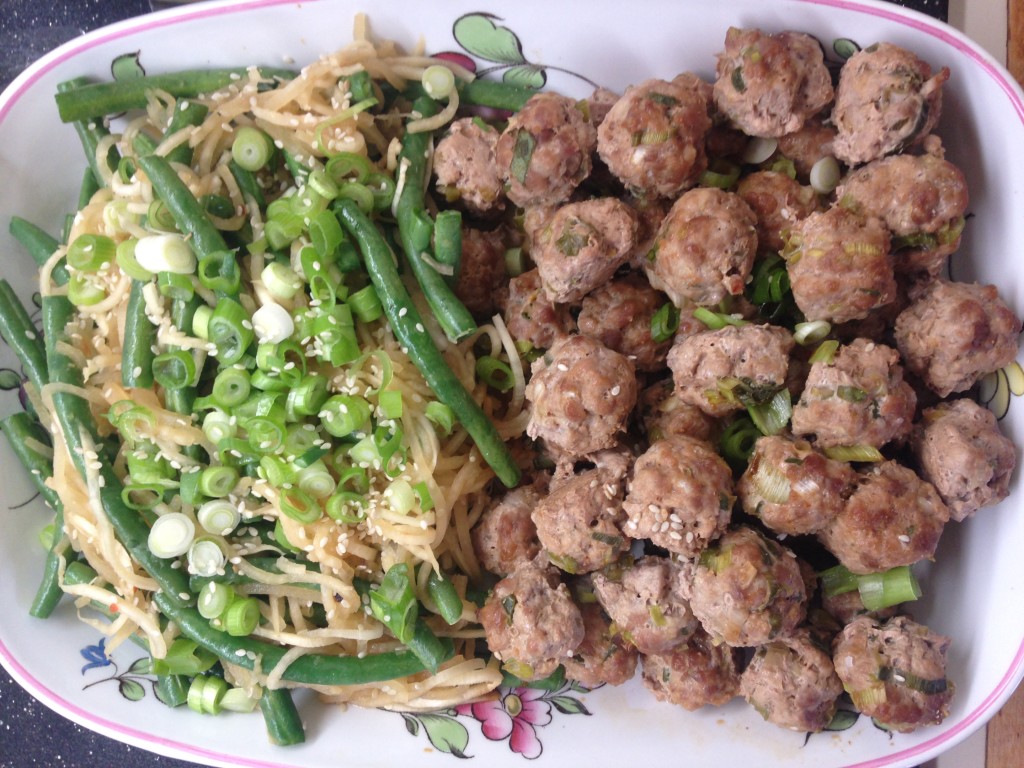
– Chicken Vegetable Soup with Mini Meatballs (This recipe depicts the way that I make my soup, except I don’t skim off fat, I reserved some of the chicken for the squash bake below, added more veggies, and added meatballs)
– Spaghetti Squash Pizza Bake from PaleOMG except I used shredded chicken in place of beef and added more veggies
– Asian Pork Stir-Fry (similar to this recipe, except I double cook the pork, and add a lot more veggies
8) Think about side dishes
Does your recipe have at least two types of veggies in it? Should you add more vegetables or a starch side? Think about any side dishes or accompaniments that you want to serve with your protein. I really like picking vegetables that can be used in multiple dishes, which cuts my grocery list down. Again, think about what will keep well in the fridge or freezer.
I’ll also add that I usually chop a few heads of lettuce or kale and have them prepped and bagged in the fridge. That way I can enjoy some fresh vegetables with my meals by putting the greens in a bowl with a dressing.
Example:
– Barbacoa Beef – Side of Roasted Zucchini & Carrots
– Chicken Vegetable Soup with Mini Meatballs – Side of Roasted Sweet Potatoes (all will freeze well)
– Spaghetti Squash Pizza Bake – Side of Roasted Broccoli (all will freeze well)
– Asian Pork Stir-Fry – Side of Turnip Noodles (I haven’t tried freezing this dish yet, but will try soon)
Think about the amount of a side you would eat for one meal, and multiply it by the number of servings you are making for that particular entree. For example, if I want 1/2 cup of roasted sweet potatoes with my soup and need six servings, I should prep at least 3 cups worth of sweet potato, or about 2-4 sweet potatoes, depending upon the size of each potato.
9) Optimize your recipe.
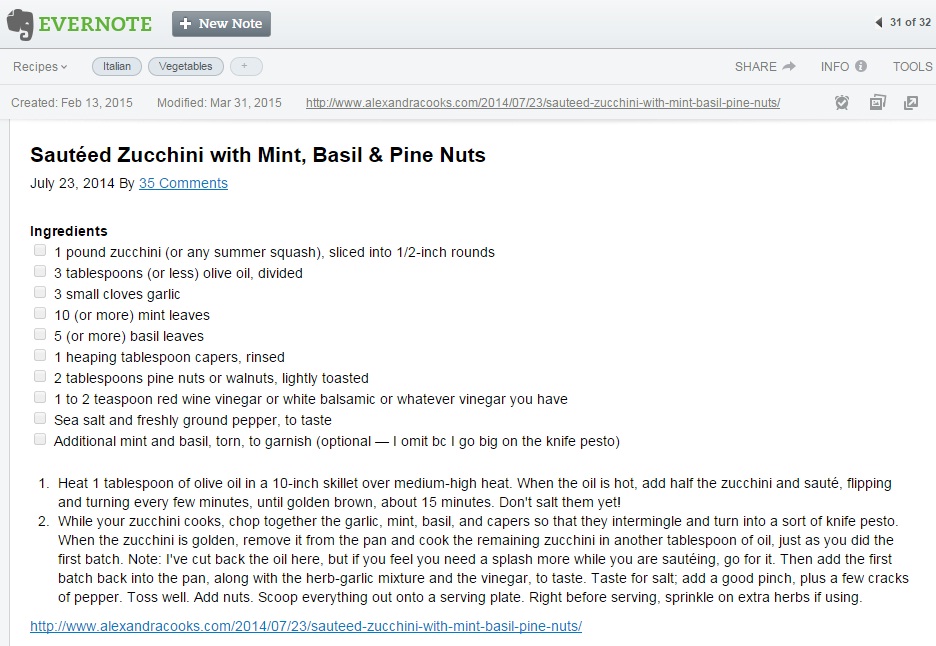
Using Evernote allows you to optimize existing recipes, as well as view them offline. If you are working from a recipe that you found from Pinterest or your favorite food blogger, either use the web clipper to capture the recipe into your Evernote notebook, or copy/paste the recipe into Evernote. If you plan to make any modifications to the recipe (ie. due to a food allergy, etc.), you can edit the recipe in Evernote. Evernote gives you the option to insert checkboxes next to each ingredient in your recipe. This will be critical for step #10 below. Do this for all of the recipes you will prepare for the week. Add in the vegetables for your meals either within the recipe, or on another recipe card, and add a checkbox next to these as well.
Here is an example of a recipe clipped from Alexandra’s Cooks. Notice the checkboxes:
10) Grocery Shopping
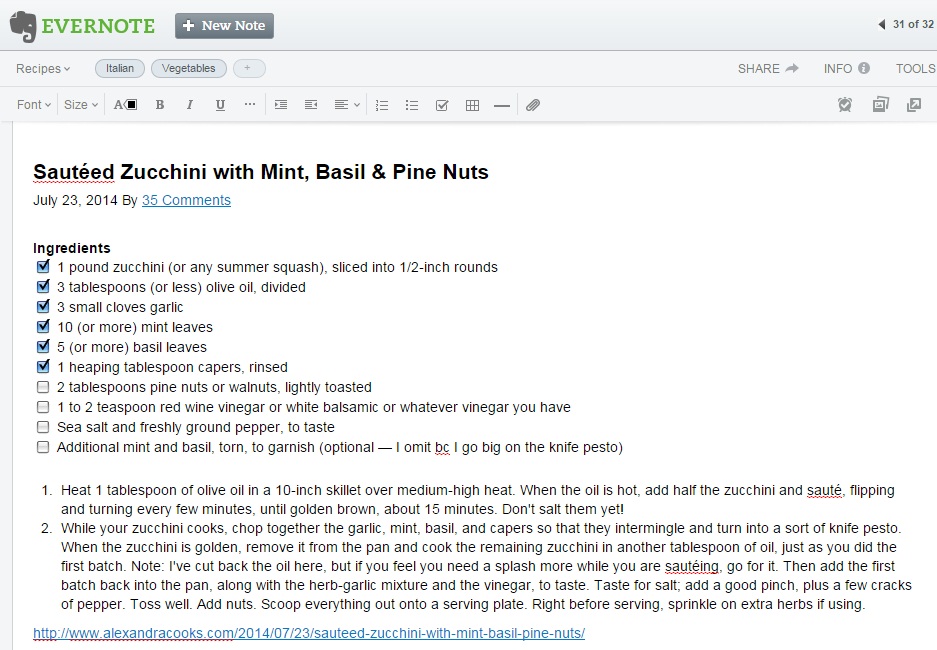
On your grocery shopping/cook day, take an electronic device with you that has the Evernote app on it. As you purchase the ingredients for your recipes, check them off of your recipe cards (see example below).
Don’t forget spices, herbs, and condiments. I personally shop at a couple of different places to get all that I need.
I thaw my proteins by moving them from my freezer to my fridge a day or two prior to my cook day, that way they are defrosted in time for cooking. You can also quickly defrost them by running them under water and then cooking Immediately. Do not defrost this way if you plan to cook later that day, the next day, etc., as you could put yourself at risk for foodborne illness.
11) After getting your groceries, it’s time to cook!
Below outlines the way I organize myself so that I can complete all of my cooking in one day. Please be aware that everyone might optimize their cooking differently, but it’s important to go into your cook day with a Plan.
As a general rule, I preheat my oven first and then prep vegetables for at least two of the meals. Depending upon the length of time it takes to prepare each meal, I usually get the most labor-intensive one out of the way first, that way I can prepare other meals while the first one is cooking. I either assemble the crockpot meal early on my cook day, or before I go to sleep. That way, it cooks while I’m working or while I’m sleeping, and I can package it when it’s finished.
A cook day using the entrees I selected might look like this:
- Preheat oven to 375 degrees.
- Get chicken soup started – Fill large pot with water, salt, and apple cider vinegar. Add whole chicken. Bring to boil. Skim off matter that floats to the top. Bring to simmer. Cover.
- Cut spaghetti squash and bake in oven.
- Cut zucchini & carrots – add fat and spices. Place in pyrex. Roast in oven.
- Cut vegetables for chicken soup – put in large bowl and set aside.
- Make meatballs for soup and partially bake (they’ll finish cooking in the soup).
- Start browning ground pork.
- Make turnip noodles with my Spiralizer. Cut vegetables for stir-fry.
- Take out spaghetti squash and cabbage out of oven while stir-fry is cooking.
- Finish stir-fry and package.
- Remove chicken from pot and set aside. After cool, shred chicken. About ⅓ will go into the soup, and 2/3 will go into the spaghetti pie.
- Make/assemble spaghetti pie. Put in oven to finish.
- Add meatballs to soup, followed by the vegetables. Once tender, add the chicken last.
- Let meals cool and package.
- The last thing I do is put the beef roast into my crockpot and cook overnight. In the morning, I shred it, and package it along with the zucchini.
The steps above ensure that you are using the oven as well as the stovetop at the same time, without trying to squish all of your meals into the oven or on the stove at the same time.
12) Packaging
There are a number of ways that you can package your meals. My husband and I have an issue with overeating if there is more food put in front of us, so I actually package all of our meals individually. We splurged on glass pyrex containers and split up each of the meals accordingly. You have a lot of different options, but we chose the 3-cup Pyrex containers and the 6-cup Pyrex containers due to their ability to go from freezer to fridge to oven.
We also have these Glasslock containers which are really leak-proof and good for soups, but I’ve read some horror stories about them shattering in the oven (we’ve taken them from freezer to fridge to oven and had no issues, but it seems they exist). My husband usually takes the larger containers, and I take the smaller ones. You can also package your meals family style in larger glass containers which are great for the fridge or freezer! I like these square family-style pyrex and rectangular family-style pyrex – both have lids and handles!
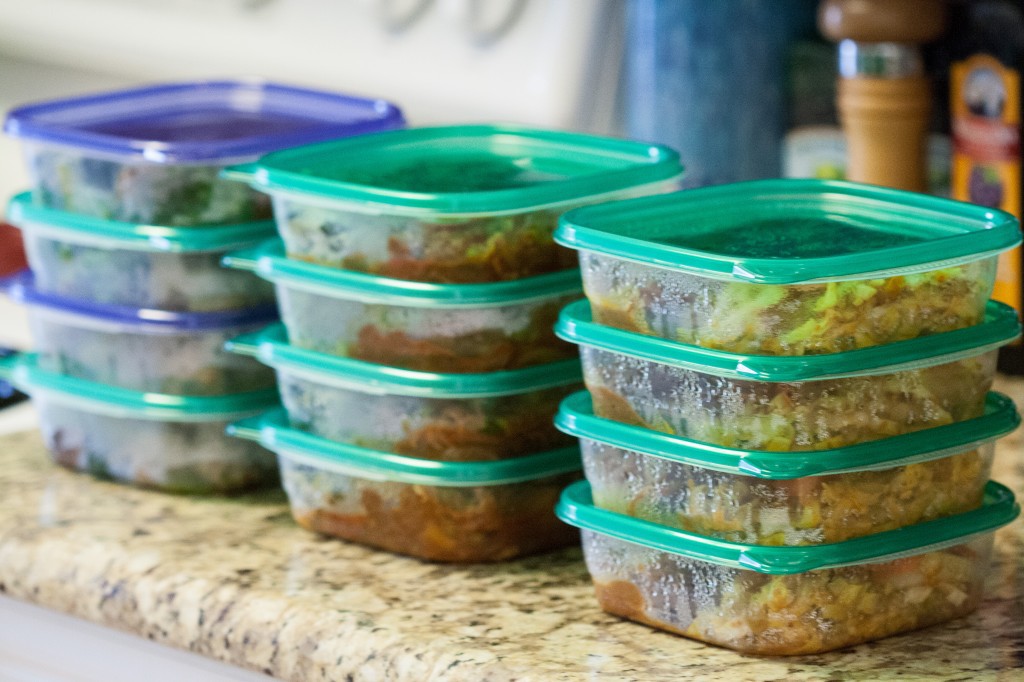
13) Labeling
If you individually package all of your meals like me, you might want to consider labeling your containers. This will really help you when you open your fridge in the morning and want to know what food you are selecting, or when you are pulling some meals from the freezer. I use these clear Avery labels for my personal chef service and in my personal cooking. You can print on them or write with a permanent marker. The ink stays put on them and the labels peel off easily without leaving any kind of mess. Along with the name of the entree, write the Date on the sticker. This will ensure that you eat the meals within their allotted window, and that you select the correct meals from the freezer.
14) Make a Meal Spreadsheet
This last step is optional, but it can be helpful because it ENTIRELY takes the guess work out of what to eat. We create a table or a chart where I write down when we will eat each meal during the week. My husband and I have it saved in a shared Google Doc that we pull up when we want to see what we said we would eat on that day. Since I have 6 servings of each entree and one throw together meal, my week would look like this:
| Sunday | Monday | Tuesday | Wednesday | Thursday | Friday | Saturday | |
| Lunch | Lunch out at Whole Foods | Barbacoa w/ Zucchini & Carrots | Spaghetti Squash Pie w/ Broccoli | Pork Stir Fry & Turnip Lo Mein | Barbacoa w/ Zucchini & Carrots | Chicken Soup w/ Roasted Sweet Potatoes [from freezer] | Spaghetti Squash Pie w/ Broccoli [from freezer] |
| Dinner | Pork Stir Fry & Turnip Lo Mein | Chicken Soup w/ Roasted Sweet Potatoes [and make a green salad!] | Pork Stir Fry & Turnip Lo Mein | Barbacoa w/ Zucchini & Carrots | Spaghetti Squash Pie w/ Broccoli [from freezer] | Tuna Salad [throw together meal] | Chicken Soup w/ Roasted Sweet Potatoes [from freezer] |
I didn’t include breakfast here, as we usually just do eggs, coffee, and maybe a smoothie.
Notice that the meals from days 5-7 say “from the freezer”. Since I have all of my meals prepared ahead of time, I know exactly what will head into the freezer at the beginning of the week, and what to take out for each of the meals near the end of the week. I recommend moving meals from freezer to fridge the 1-2 days before you eat them, depending upon the size of the container you use. That way, the meal should be fully thawed by the time you take it from the fridge to the oven.
Freezer Tip — I recommend that all of your packaged meals sit in the fridge first before heading to the freezer. The containers that are designated for the freezer should sit in the fridge for at least 12 hours or a day. I recommend this because putting meals directly from the countertop to freezer promotes condensation on top of the meals, which leads to freezer burn. Since we definitely Don’t want that with our meals, keep them in the fridge to cool down properly, and then transfer to the freezer!
You’re all done! Now you can enjoy delicious food throughout the week, without having to prepare meals each evening. I hope these tips on Meal Planning and Batch Cooking have been helpful for you! I will post a round up of my favorite crock pot and freezer-ready meals in my next post, so stay tuned! In the interim, leave me a message in the comments if you found this helpful, or if you have any special tricks and tips of your own!

Hey Priscilla- would you mind sharing that stuffed eggplant recipe?
Hi Theresa! Yes, I will work on getting that recipe up on the blog soon 🙂 It’s super easy and delicious!